I love pom poms and as a child spent many a happy hour winding wool through discs of cardboard, cutting through the wrapped wool, tying a knot and then trimming the finished pom pom. There is something very satisfying about them, they are very tactile as well as huge fun.
Pom pom making has become far far easier with the appearance of pom pom makers (mine was from Tiger Stores – Clover do excellent ones available from Amazon) – making each now takes a few minutes and the resultant pom poms are altogether neater.
This pom pom wreath is a fun afternoon project.
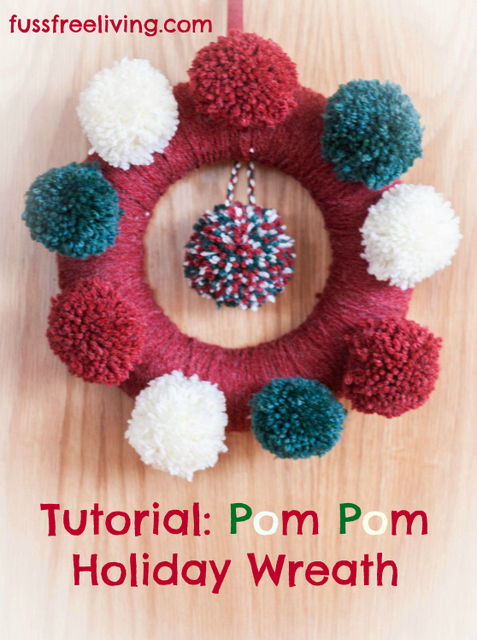
Pom Pom Holiday Wreath
You will need
1 polystyrene / styrofoam wreath – 25cm – from Hobbycraft in the UK, Joann’s in the US
120g Aran weight yarn in three colours
Pins
Pom Pom Maker
Scissors
Wool needle
30cm ribbon
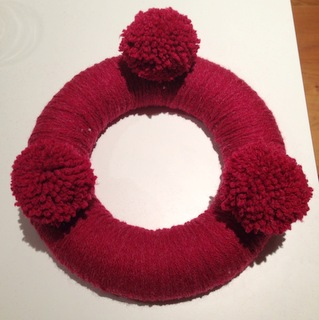
Choose a colour for the wreath, use a pin to secure the yarn to the back and start wrapping. Your might find it easier to wind the yarn into smaller balls to do this – I had to as my initial ball was massive. Keep going until you finish, snip the yarn and secure with a pin. Do not worry too much about how the back looks, as long as the front is covered.

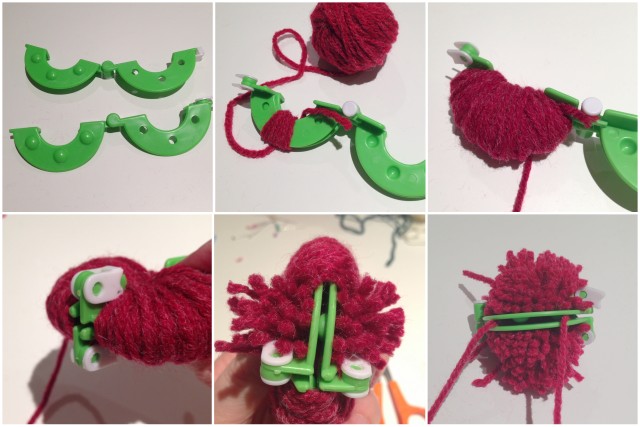
To make the pom poms wind the yarn around each half – be generous with the amount of yarn you use – a fuller pom pom looks so much better. Once wound clip the pom pom holder shut and cut round the wound yarn and tie with another length of yarn. You need to tie the contrasting colour pom poms using the same colour you wrapped the wreath with – or use the wool needle to thread a strand through the middle or the finished pom pom.
When each pom pom is cut and tied, remove from the pom pom maker and gently roll between your hands to fluff. Trim any straggly bits – I really recommend that you do this over a tray or large bowl as it generates a large pile of fluff.
Decide how you will arrange your pom poms around the wreath, I used 3 of each colour. Tie one of each colour on first and then add the others. Trim the ends.
For the centre pom pom I wound the maker with three strands of yarn at once and then threaded onto a a plaited cord. Pin onto the back of the wreath.
Make a loop of ribbon and pin securely onto the back of the wreath. I used two pins for this to make sure it would not pull out.
Hang on a door or wall and enjoy.
I think that without the centre pom pom this would also make a nice table centre piece.
Sending these to Thinly Spread’s Festive Friday.
I just love this, I’m going to get the foam wreath and we’ll start making Pom poms this weekend! It’s such a great idea! Jude x
Wreaths are 3 for 2 in Hobbycraft atm Jude! Cannot wait to see what you make.
Very cute. Must give this a go with my girls
Let me know how it goes Urvashi.
You beat me to it! My pompous are ready to go but I’m in Zurich for the next two weeks…
Looking good!